Welcome to the InvoiceOffice Help Desk
How invoice office timesheet works?
Invoice office timesheets can be used to track working hours/time of your ongoing projects/tasks. You can easily send this timesheet as an invoice to your customers. In this post, you will learn how to create a timesheet
Step 1: Create Projects, Team & Tasks
On your dashboard, go to “Projects > create projects”.
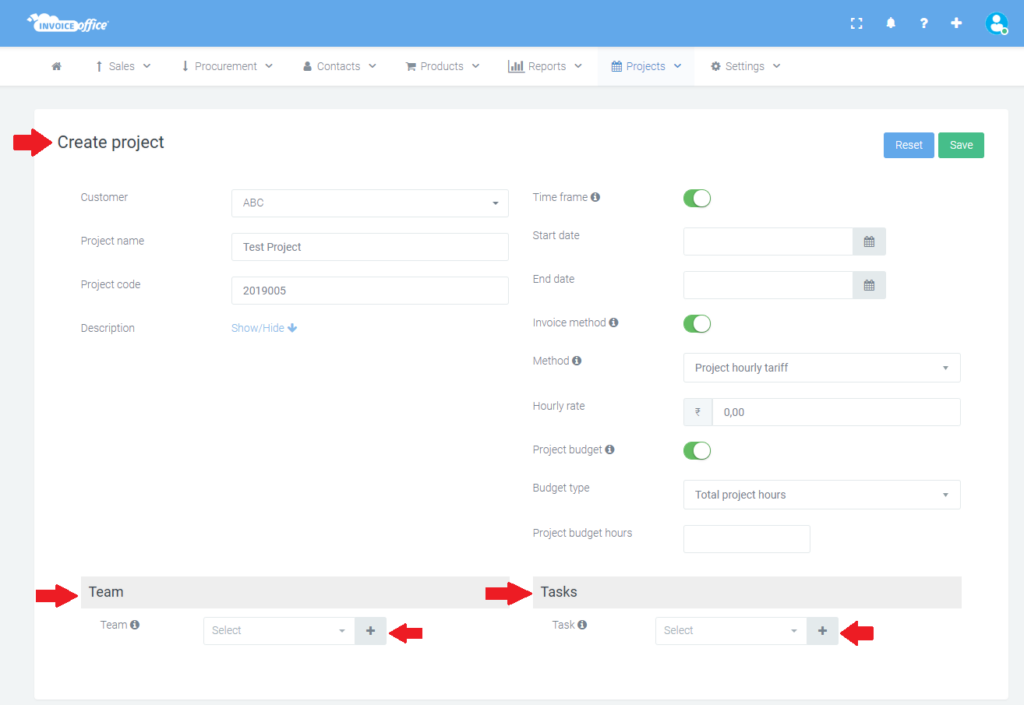
Created a project and add additional information as follows:
Customer: Select the customer you have a project for.
Project name: Add a name of your ongoing project
Project code: Here you can give your project code.
Description: Add some additional information about your project. (if any)
Time frame: By turning this option ON, you can give your project a beginning and end date.
Invoice method: By enabling this option, you can select your hourly tariff per task, person or project. Mention the hourly rate also.
Project budget: By turning this option ON, you can select how you want the budget to be calculated.
Don’t forget to save the details
Now create Team and Tasks as follows
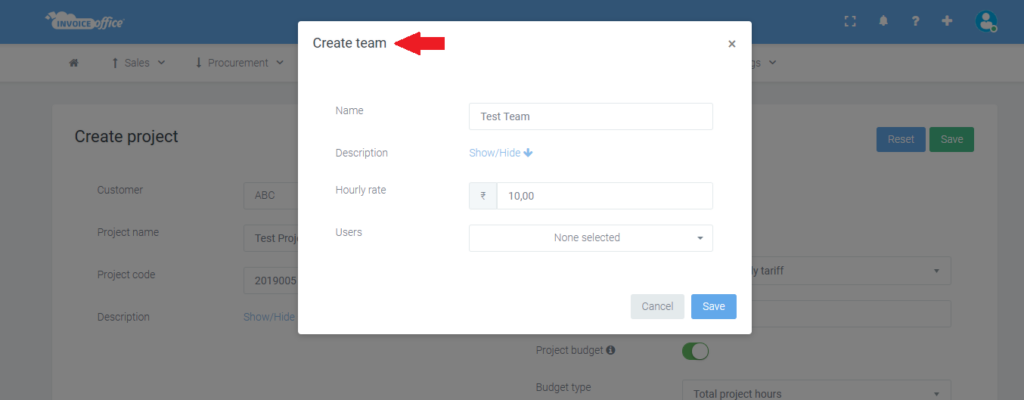
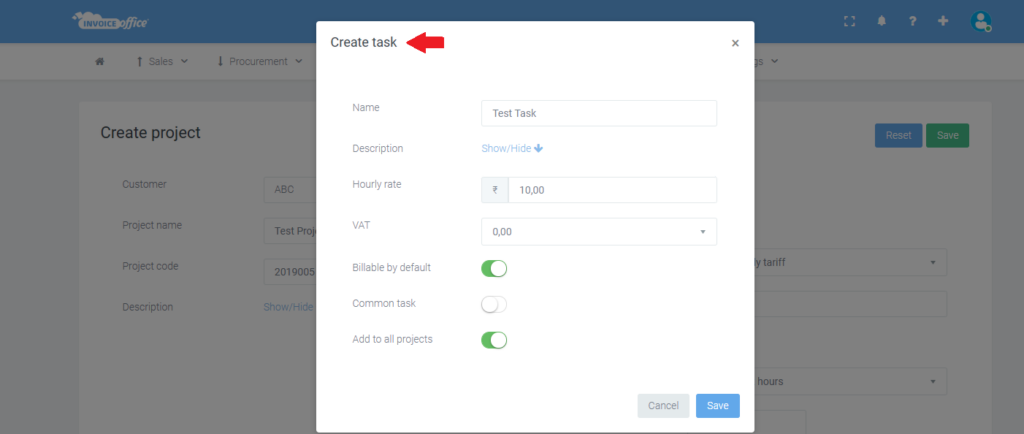
When you have created a project, team, and task you can start with your timesheets.
Step 2: On your dashboard, go to “Projects > timesheets > add timesheet”.
Select which project, team, and task you would like to track in your timesheets.

You can Add Rows per day or per week.
When selecting the Days button you can start your timer and track your time spent on different projects or tasks.
When selecting the Week button you can manually fill the time in per day that you expect to spend on projects and tasks.
By clicking on the different days of the week you can choose to track the time spent on your different projects and tasks.
You can select an overview of the week/day and time how long you are working on your project per week/day.
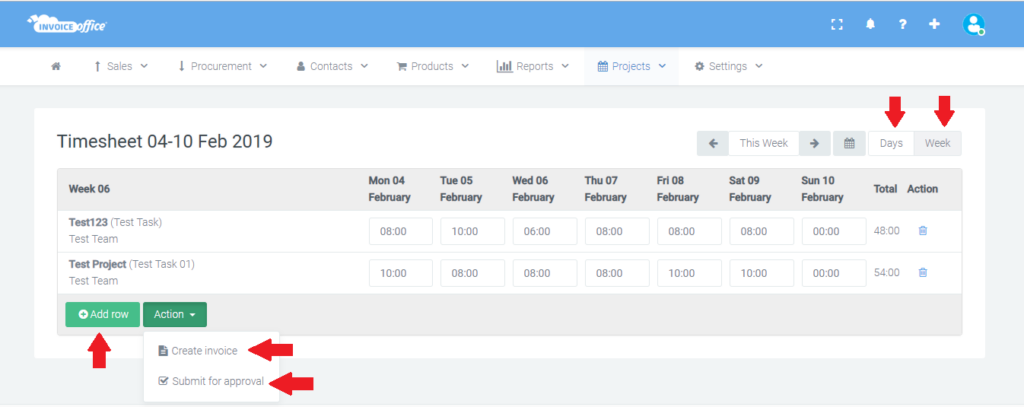
When clicking on the Action button, you can choose to send your timesheet to your client for approval or create an invoice for your client.
Fill the customer name and choose the desired options below that you want to show on your invoice
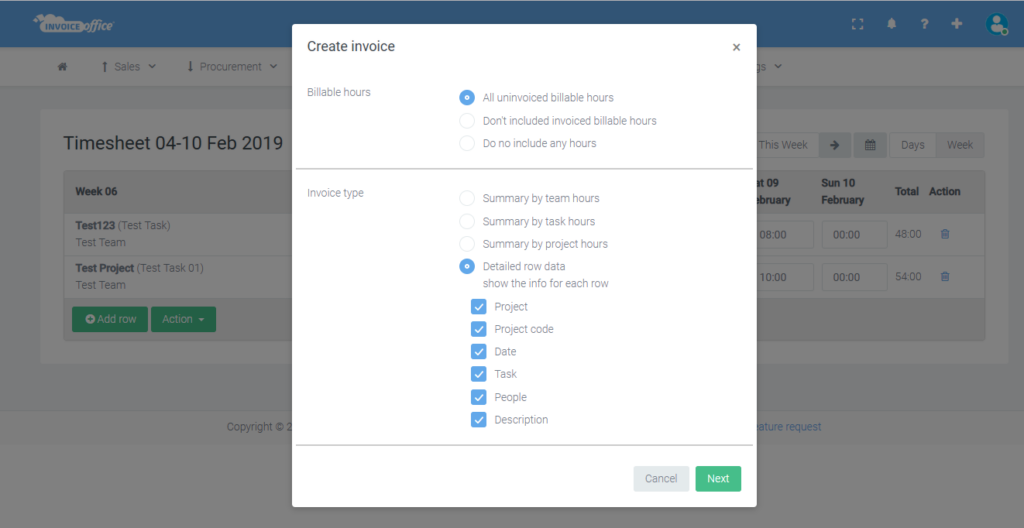
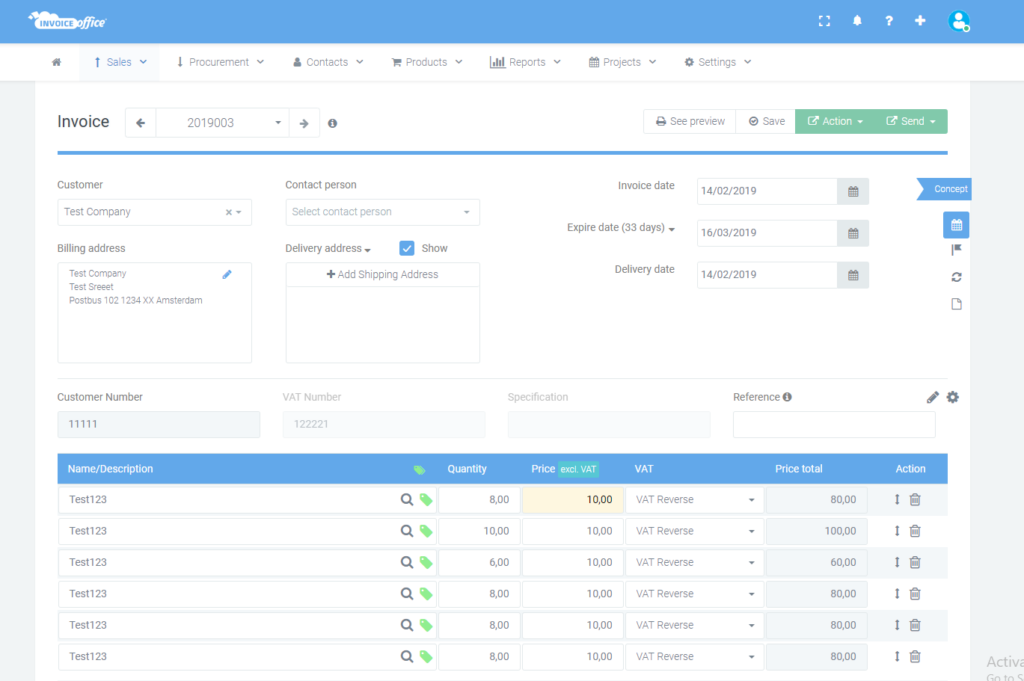
Now create an invoice and send it to your customer.
Before creating an invoice, you can also send your timesheet for approval to the client. Click action > submit for approval.
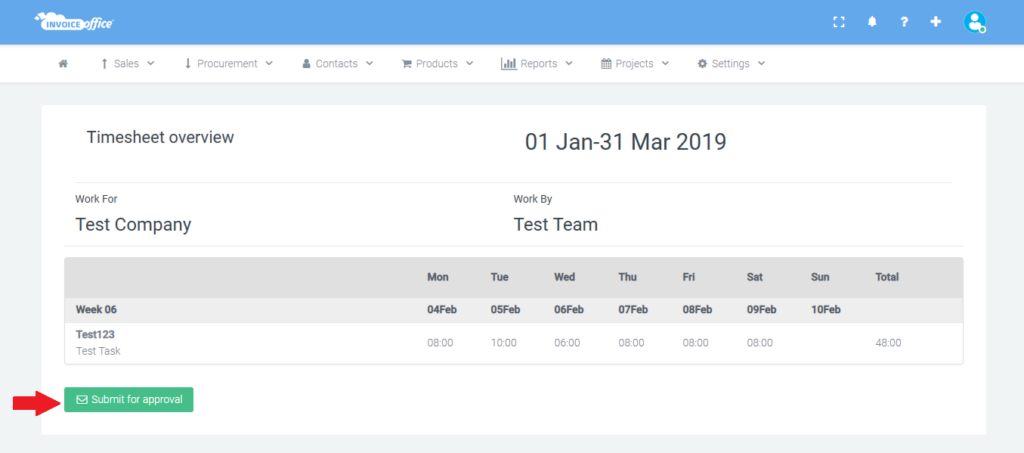
Under the tab Projects, you can select Approvals, here you can see an overview of your approved timesheets.
