The Jira connector brings the work your team tracks in Jira into Invoice Office, ready to bill. Jira projects become customers and projects, issues become tasks, and every worklog becomes a line on the timesheet — so the hours someone logged against a ticket are the hours you invoice, without anyone adding them up at the end of the month.
Data travels one way: Jira → Invoice Office. Jira stays the place where work is planned and logged; Invoice Office is where it is billed. Nothing you change in Invoice Office is written back to Jira.
Before you start
- A licence that includes the Jira connector. Without it the Jira card shows License Required and its switch stays off.
- A Jira Cloud site (the address that ends in
atlassian.net). - An API token for the Atlassian account the connector will use. Create one under Security → API tokens in your Atlassian account settings. The account needs to see the projects, boards, issues and worklogs you want to bill.
- Jira administrator rights, or an administrator who can create the webhook for you (step 2).
1. Connect Jira in Invoice Office
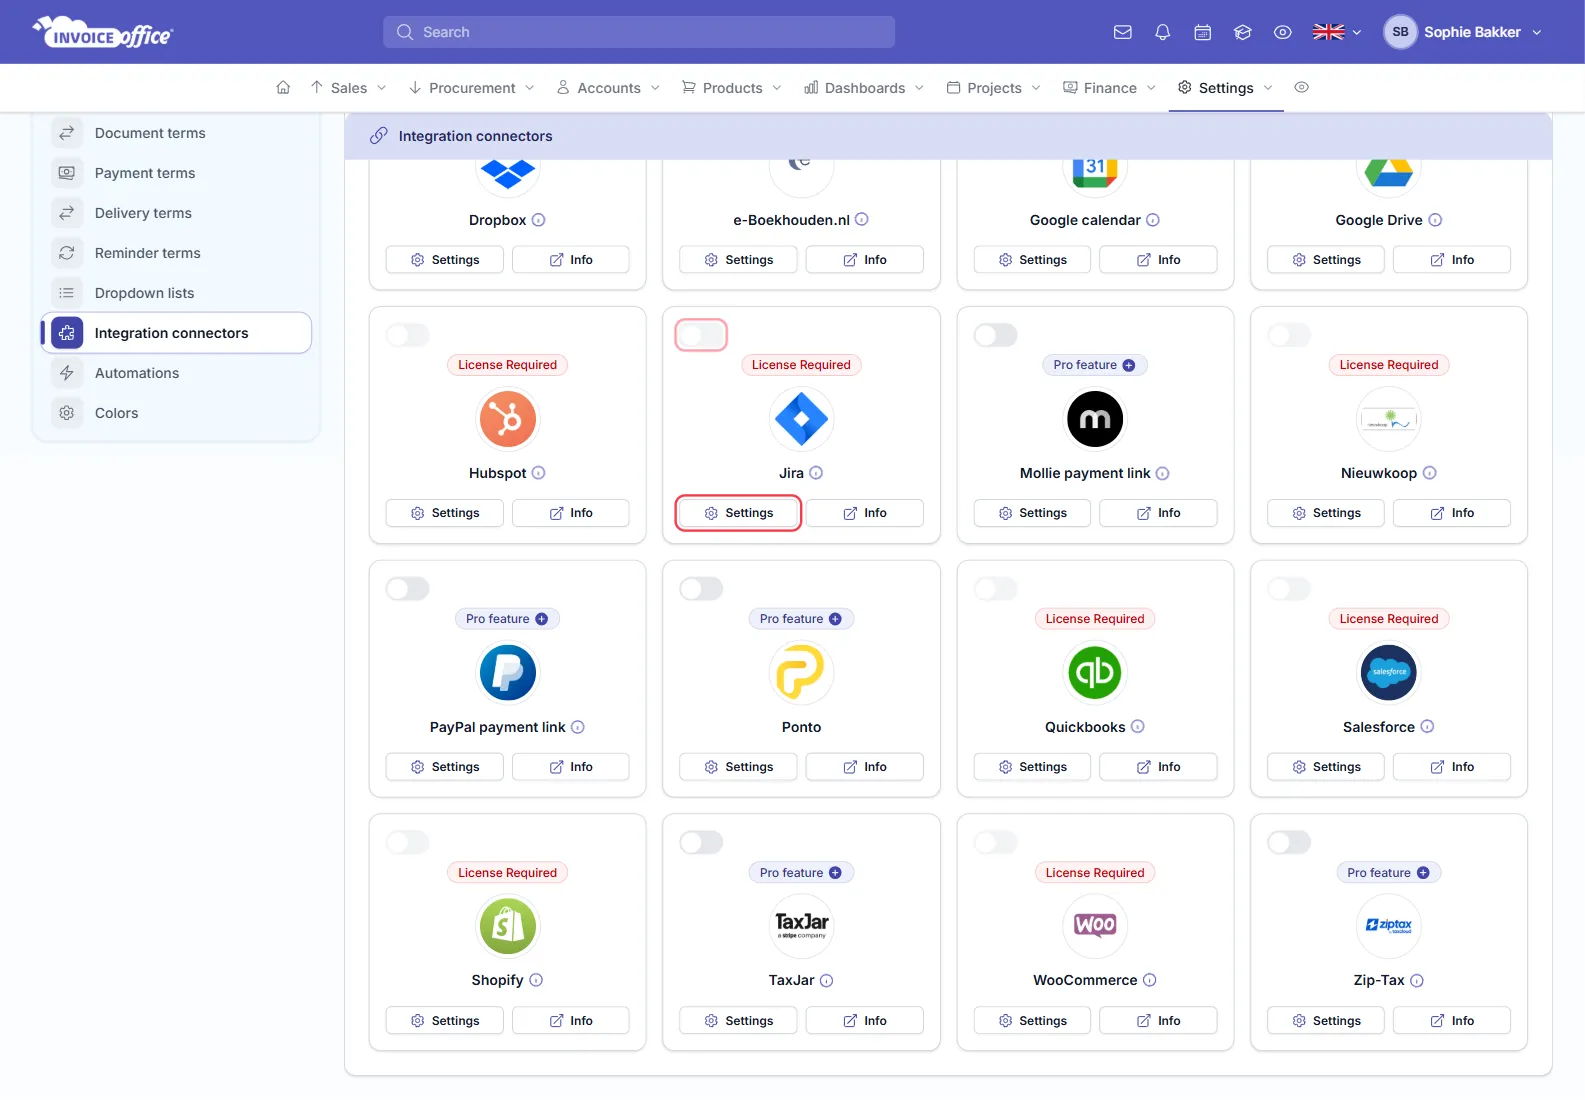
- In Invoice Office go to Settings → Integration connectors.
- Find the Jira card and click Settings.
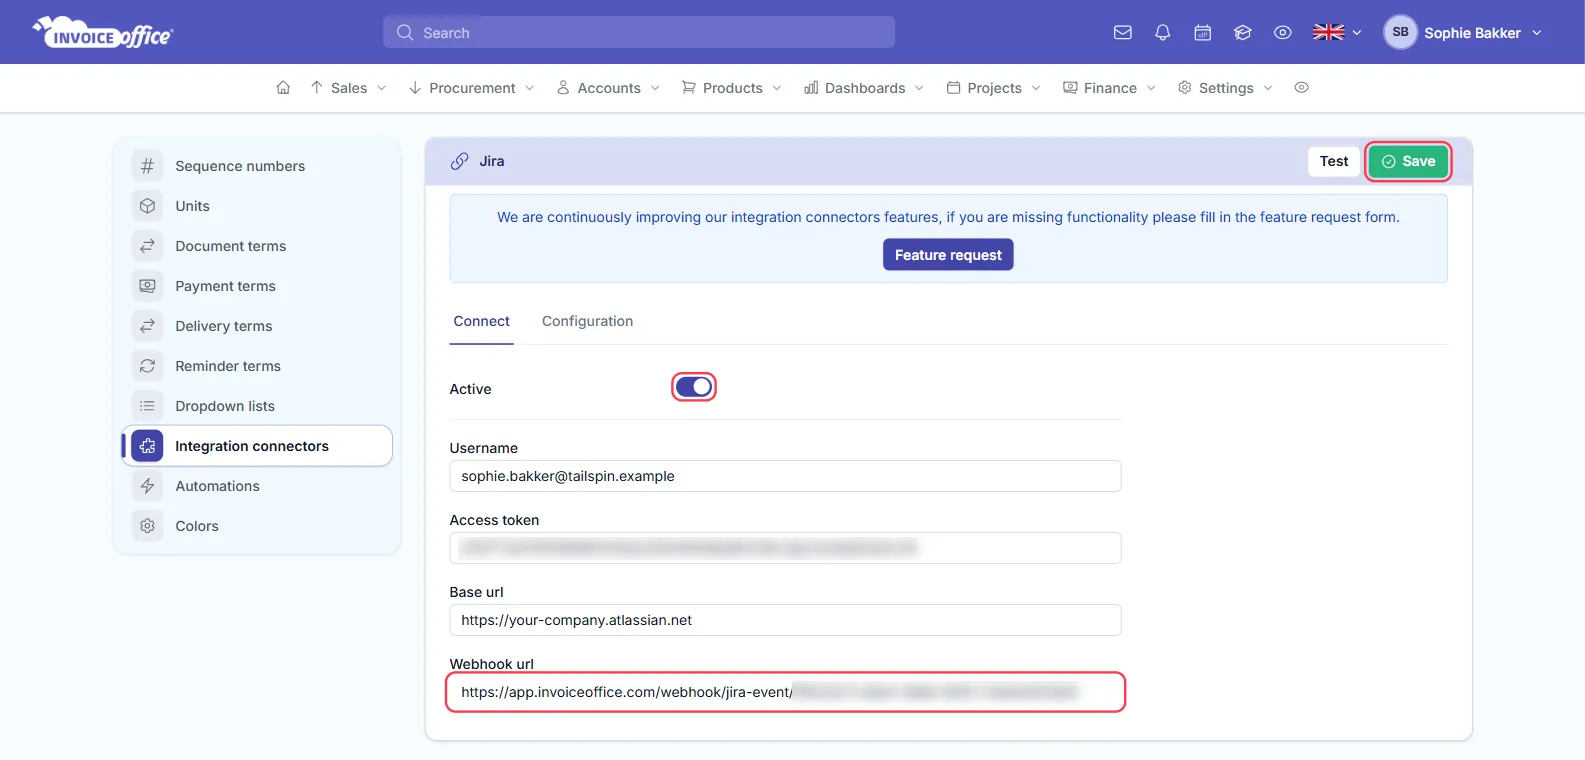
- On the Connect tab, switch Active on and fill in:
- Username: the email address of the Atlassian account.
- Access token: the API token you created.
- Base url: your Jira address, for example
https://yourcompany.atlassian.net.
- Click Test to check the credentials, then Save.
The same tab shows a read-only Webhook url. Copy it — you need it in step 2. It is unique to your account, so share it only with whoever sets up the webhook in Jira.
2. Create the webhook in Jira
The webhook is how Jira tells Invoice Office that something changed. Without it, nothing comes across.
- In Jira, open Settings (⚙) → System, and under Advanced choose WebHooks.
- Click Create a WebHook and give it a name, such as Invoice Office.
- Paste the Webhook url from Invoice Office into URL and make sure the webhook is Enabled.
- Tick the events Invoice Office uses:
- Issue: created, updated, deleted
- Worklog: created, updated, deleted
- Project: created, updated, deleted
- User: created, updated, deleted
- Click Create.
Optionally, add a JQL filter to the issue events — for example project = ABC — if only some projects
should be billed through Invoice Office. Atlassian’s
Jira webhooks documentation covers the
Jira side in more detail.
From then on, Jira notifies Invoice Office as work happens — a new issue, an edited worklog, a renamed project — so the timesheet is current rather than waiting for a month-end import.
3. Choose how Jira maps to your projects
Open the Configuration tab of the Jira connector. Three settings decide how Jira’s structure becomes yours:
- Invoice Office Customer — set it to Jira project, so each Jira project becomes a customer in Invoice Office.
- Invoice Office Project — choose Jira project to make each Jira project a project, or Jira epic to make each Epic one. Pick Jira epic if one Jira project holds work for several jobs you bill separately.
- Invoice Office Task — tick the Jira issue types to import as tasks: Jira Epic, Jira Story, Jira Task, Jira Issue, Jira Bug, Jira Feature, Jira Refactoring and Jira Sub-task. Tick at least one. When projects come from Epics, Jira Epic cannot be ticked here.
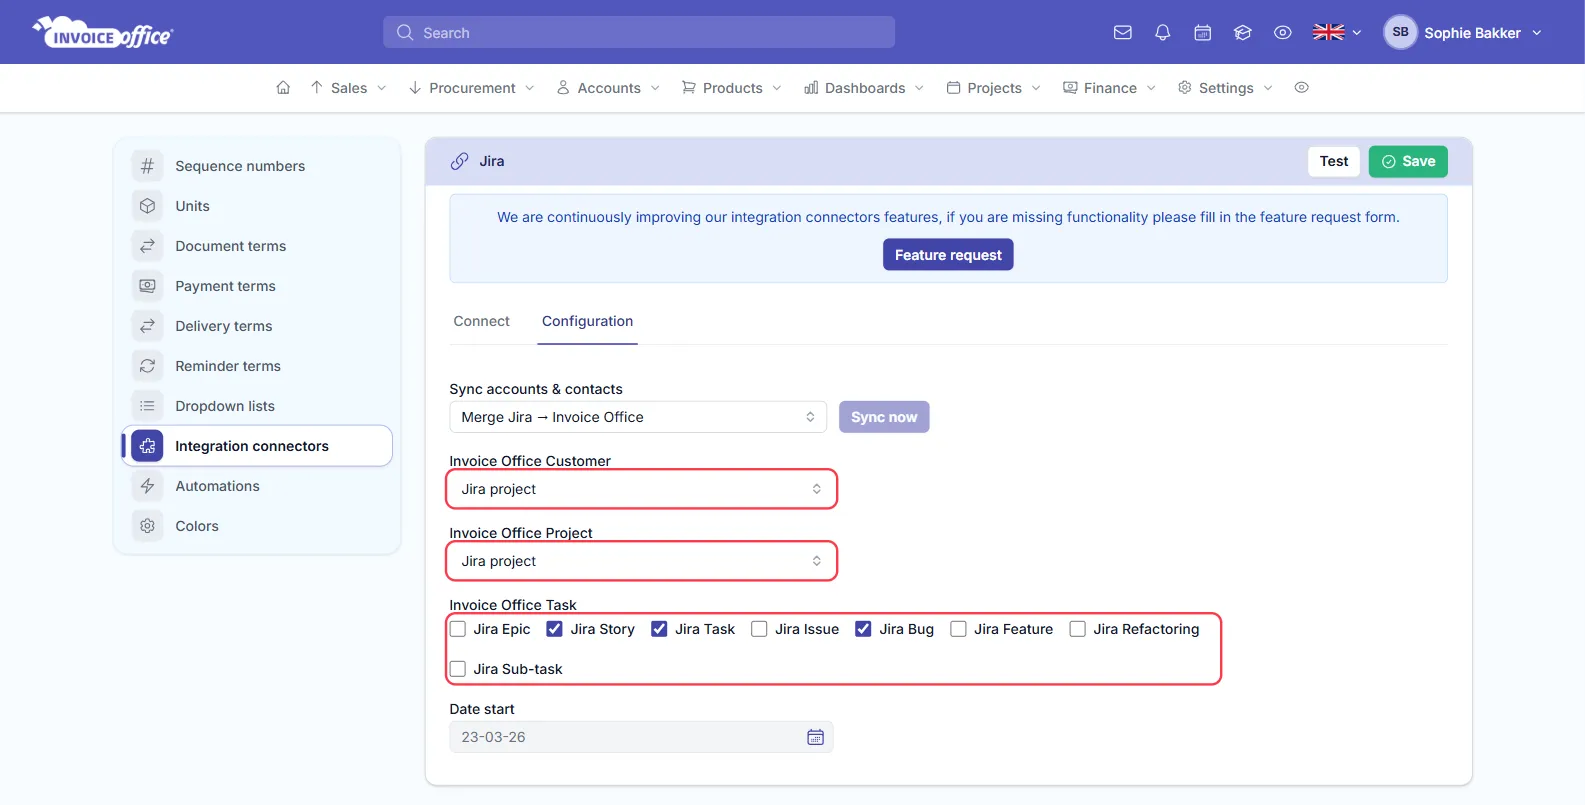
Click Save after changing them. It pays to settle these before the first hours come in: they decide where every timesheet line lands.
What comes across
| In Jira | Becomes in Invoice Office | Details |
|---|---|---|
| Project | Customer (and project) | Name and description; the customer is labelled Jira |
| Epic (if chosen) | Project | Linked to the customer for its Jira project |
| Issue of a ticked type | Task on the project | Summary as the name, description, issue key and type; the original estimate as budget |
| Worklog | Timesheet line | Date and time spent, recorded as both hours and billable hours |
| Assignee (or reporter) | Team member on the project | Added as a contact without a login |
| User | Contact | Name and email; marked inactive when the Jira user is |
New projects use the budget, budget hours and hourly rate from your project settings. Deleting an issue, worklog or project in Jira removes it here too.
Two things to know:
- Issues must be on a Jira board. Issues that are not on any board are not imported.
- Imported hours start out billable. Adjust the billable hours before invoicing if not every hour should be charged — Invoice Office keeps your edit even if the worklog changes in Jira afterwards.
From logged hours to an invoice
Imported hours land on the timesheet with the Jira key, summary and type beside each line, so a customer querying an invoice line can be shown the ticket behind it. Filter by customer, project, team and period, correct the billable hours (a Pro licence) or add a note, then select the lines and click Create invoice. See how the timesheet works for the details.
If it stops working
If Jira rejects the access token — because it expired or was revoked — Invoice Office switches the connector off and sends you a notification that the API key or access token has expired. Create a new API token in Atlassian, paste it into Access token, switch Active back on and Save.
If hours stop appearing while the connector is on, check in Jira that the webhook is still Enabled and still points at your Webhook url. The integration connectors dashboard shows executions, status and failure rate, so you can see whether Jira’s messages are arriving.
For help with your configuration, contact us.