🚀 Peppol Setup in Invoice Office: Your Simple Guide to Secure E-Invoicing
The world of invoicing is rapidly moving away from paper and PDFs toward digital solutions. Peppol (Pan-European Public Procurement Online) is the secure, international network leading this charge, making e-invoicing faster, cheaper, and more reliable than ever before.
Are you an Invoice Office user? Setting up your Peppol connection is often just a few clicks away! We’ll walk you through the crucial, easy-to-follow steps to get your business Peppol-ready, using a real-world example of what you’ll see directly in your Invoice Office account.
Why Choose Peppol E-Invoicing?
Before diving into the Peppol setup, here’s a quick reminder of the key benefits you’re about to unlock by adopting this global standard:
⚡ Faster Payments: Direct, machine-to-machine transfer means no more manual data entry, saving time for both you and your customer and speeding up the payment cycle.
🔒 Enhanced Security: The Peppol network is highly secure, significantly reducing the risk of fraud and ensuring documents are delivered reliably to the correct recipient.
🌍 International Reach: Send and receive invoices with any Peppol-connected business or government agency across over 35 countries. This is crucial for cross-border trade.
✅ Simplified Compliance: Peppol automatically adheres to evolving e-invoicing standards (like Peppol BIS), ensuring your business remains compliant with national and international regulations.
Configuring Your Peppol Connection in Invoice Office
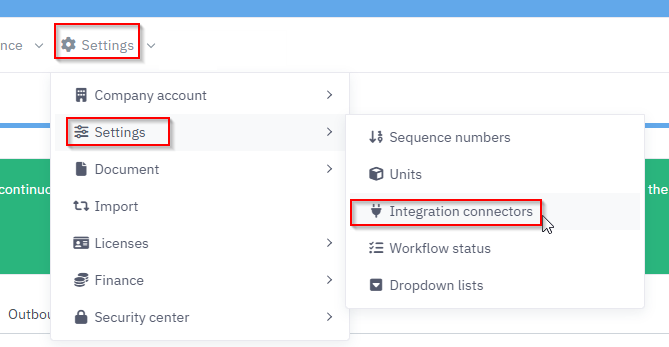
Step 1: Enable the Peppol Integration Connector
Before you can send or receive any documents, the main Peppol connector must be enabled.
Navigate to the Integration Connectors page via the header menu. From the overview, select Peppol to access its configuration settings.
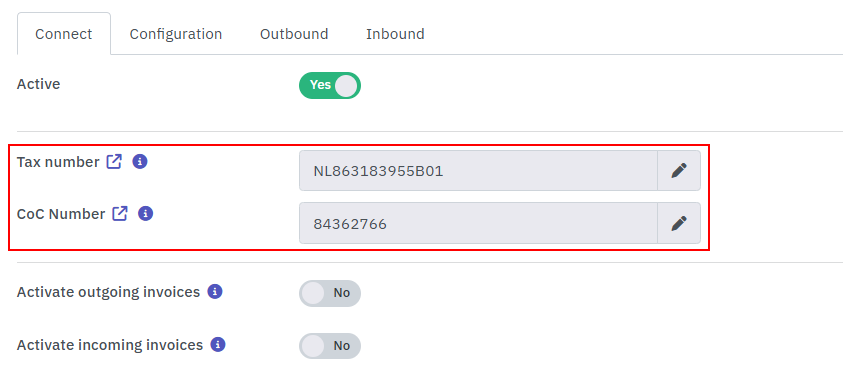
Locate the Active toggle at the top of the “Connect” tab.
Ensure it is switched to Yes (Green).
Step 2: Verify Your Network Identifiers
Peppol uses specific identifiers to route invoices to the correct business. Your screen shows two critical fields that must be filled:
Vat/Tax/BCE Number: This is your Vat/Tax/BCE ID (e.g.,
NL863183955B01). This is used for tax validation and international routing. This is your primary identifier used to find your business on the Peppol network.CoC Number: This is your Chamber of Commerce (KvK) number (e.g.,
84362766). This is the secondary identifier used to find your business on the Peppol network.
If these fields are incorrect or empty, click the Icon after the label to edit them. Ensure they match your official business registration exactly.
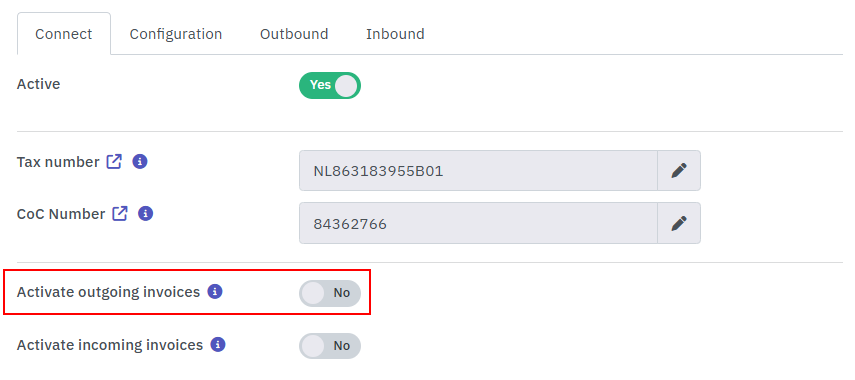
Send invoices & Credit Notes
By enabling this feature, you allow your account to transmit your digital invoices directly to your customers’ accounting software through the secure Peppol network.
Steps to Enable
Toggle the Switch: Locate the Activate outgoing invoices row and slide the toggle to Yes.
Check Outbound Queue: Once activated, you can monitor the status of sent documents under the Outbound tab in the top navigation bar.
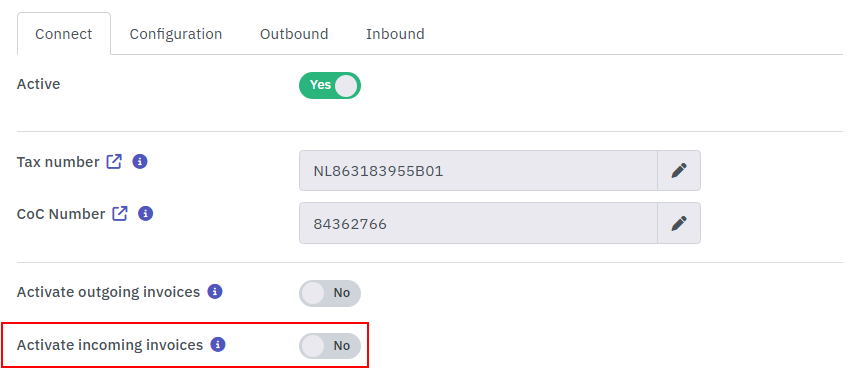
Receive purchase invoices
By enabling this feature, you allow your account to receive digital invoices directly from your supplier’s accounting software through the secure Peppol network.
Steps to Enable
Toggle the Switch: Locate the Activate incoming invoices row and slide the toggle to Yes.
Check Inbound Queue: Once activated, you can monitor the status of sent documents under the Inbound tab in the top navigation bar.
Enable Peppol for your customers
To ensure your invoices are delivered electronically via the Peppol network, you must correctly identify the recipient using their official registration numbers on the customer settings page. Follow these steps:
Review the Preset Identification Number
To save you time, the system will preset the identification number based on the data already available in the customer’s general profile (such as their VAT or registration number).
Verify that the number appearing in the text field (e.g.,
BE07178229302) is correct.If the field is empty or incorrect, you can manually type or edit the number.
Validate the Connection
Click the Search/Magnifying Glass icon to the right of the number. This triggers a real-time check of the Peppol network to:
Confirm the customer is registered to receive e-invoices.
Verify the identifier is valid and save the customer settings page.

Sending E-Invoices
When creating a new invoice or credit note, the Invoice Office platform will automatically check if your account is Peppol-connected. If you are, you can select the option to send the invoice via Peppol in the document Send menu.