Welcome to the InvoiceOffice Help Desk
How to Create & Manage Your Users
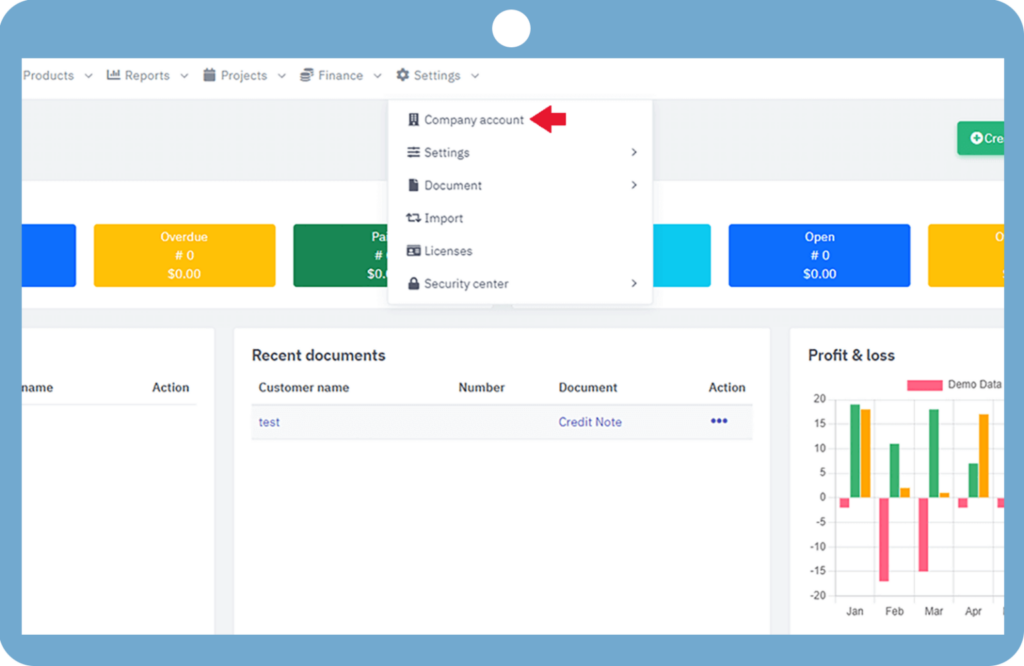
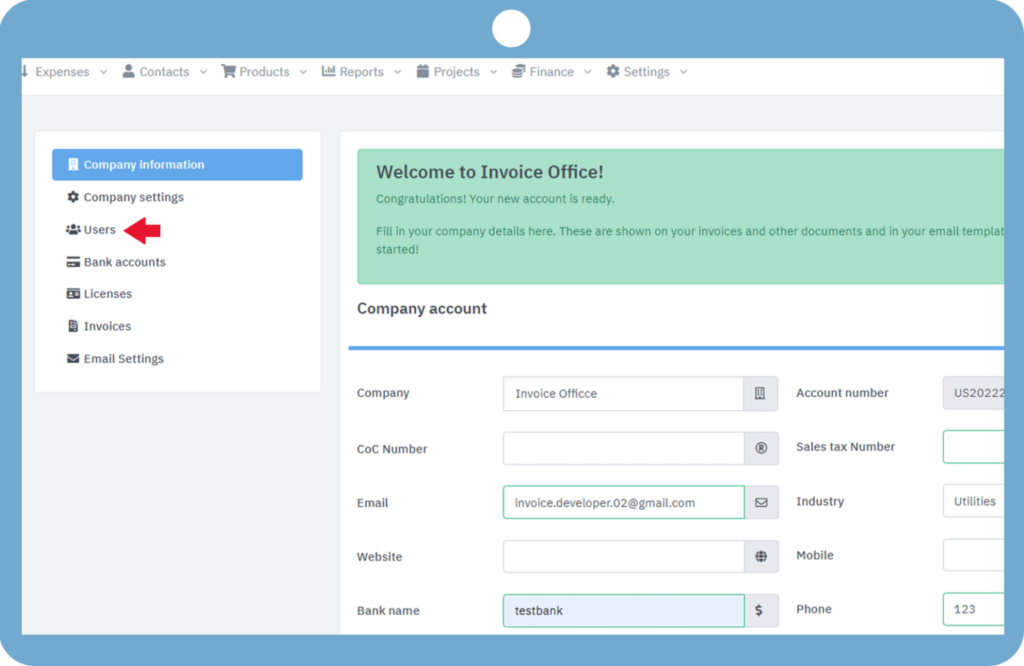
To create a user Go to “Settings > company account”. Now click on the “User” in the left-side menu.


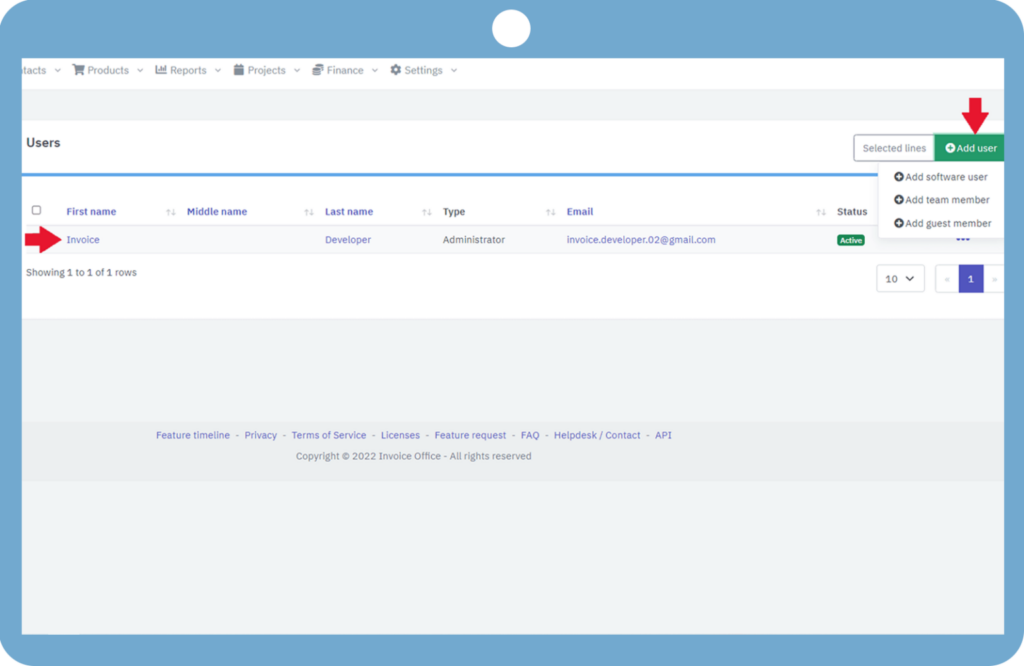
Now the admin user is shown on the user page and in the top right corner of the page, there is a button named “Add user” by which we can create the user. Here, users of three types can be created. “Software user“, “Team member“, and “Guest user“:

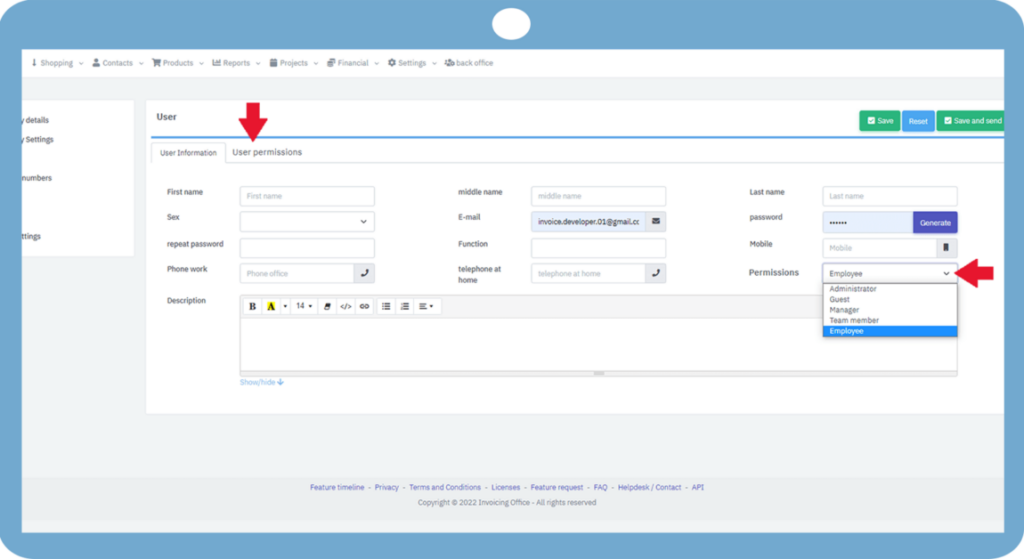
Software user: Software users are the administrator’s users. When we create a software user, then we need a license for that. A License is required for every software user because we can also give administrator permissions to the software. To create a software user just click on “Add software user” fill in all the details, set the user’s permissions, and then save it. From here we can also check the permissions of the user.
Team member: To create a team member, click on “Add team member” and fill in all the details, the permissions of the team member will not change because it is used only in the timesheet. Team members are only active within projects and timesheets. Check user permissions by going to “user permissions”.
Guest user: Guest users have only read permissions to your account data (by example Financial Accountants). So when we create as guest members, they can only read the data in your account. To create a guest member, simply click “Add guest member, ” fill in the details, and save.
Unlike software users, team members, and guest users are free accounts. You don’t require any license for Team members and Guest users.

If you have any doubt, feel free to contact us.
